When you are upgrading the vcenter you will encounter this error. The error will look like below:
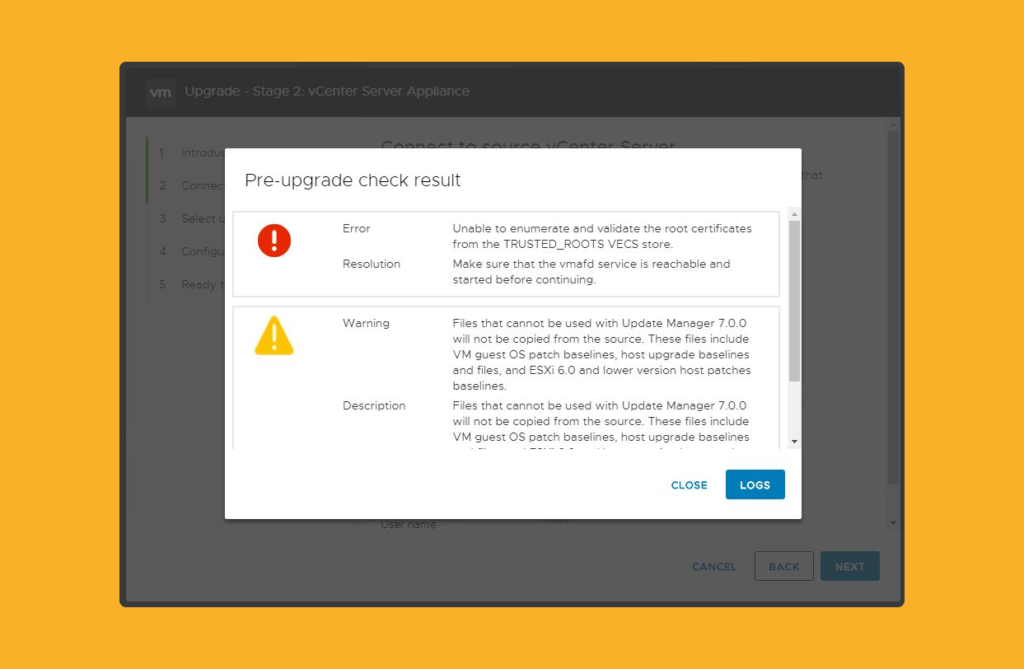
Due to this, you are unable to upgrade the vCenter. In order to proceed with the upgrade you need to check the below things:
Table of Contents
Back-in-time release
Upgrade to a vSphere version that is released prior to your current installation is not supported. Back-in-time release: A patch or update release that is backdated with reference to the release you are planning to upgrade from.
To know more you can also visit the below site:
https://kb.vmware.com/s/article/67077
Sometimes you also need to verify the build number. To confirm that you can visit the below link:
https://kb.vmware.com/s/article/1022196
Once you verify that check for the upgrade and if still an issue proceed with the next steps.
Check Service Status
Log in to vCenter using SSH and check whether all the necessary services are running or not. Especially check for applmgmt and vmware-statsmonitor.

- applmgmt: Applmgmt service provides operations Get the health status of applmgmt services.
- vmware-statsmonitor: vCenter Stats Monitor Service (VMware Appliance Monitoring Service) is responsible for collecting CPU, memory, and other vCenter Server Appliance Management Interface statistics required to view the vCenter Server Appliance health status
Once all the services are running, Try again the upgrade and check if it is upgrading or still facing any issues.
Check entries in the trusted root store
In order to check the current entries you need to run the below commands:
/usr/lib/vmware-vmafd/bin/vecs-cli entry list --store TRUSTED_ROOTS | grep AliasOnce you have the output verify if there are any invalid out. You can see something like this below:

Sometimes you won’t find any invalid entry like that then you need to run the below command and check the content specially the cert.
/usr/lib/vmware-vmafd/bin/vecs-cli entry list --store TRUSTED_ROOTSSometimes you will find multiple certs to one alias. That will look similar to the below output:
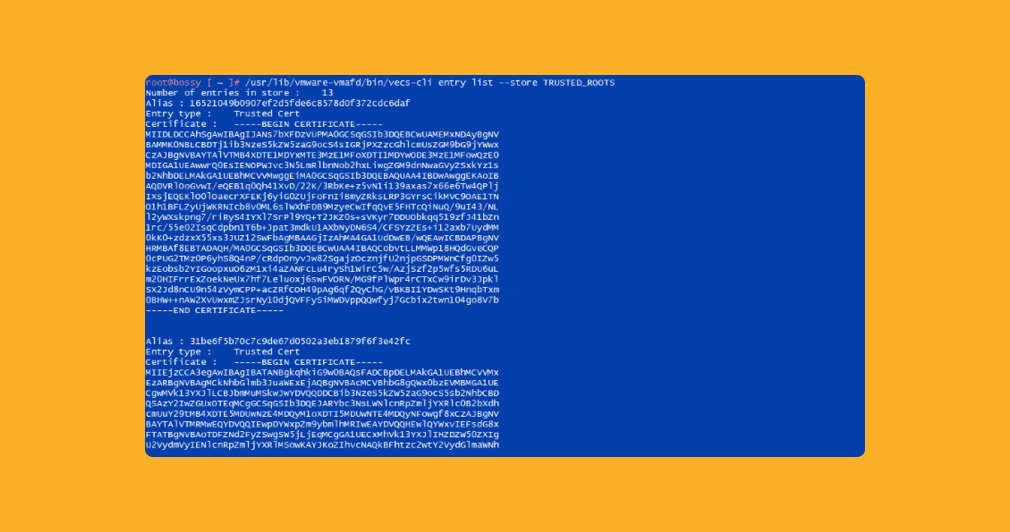
Now you need to take the backup using the below command:
/usr/lib/vmware-vmafd/bin/vecs-cli entry getcert --store trusted_roots --alias <URL> --output <location>The final example command will look something like the below:
/usr/lib/vmware-vmafd/bin/vecs-cli entry getcert --store trusted_roots --alias https://192.168.148.60:8443/vasa/version.xml --output /storage/core/nimble192.168.148.60.crtNow you need to delete the entry for that you need to run the below command:
/usr/lib/vmware-vmafd/bin/vecs-cli entry delete --store trusted_roots --alias <URL>The actual example command will look similar to the below:
/usr/lib/vmware-vmafd/bin/vecs-cli entry delete --store trusted_roots --alias https://192.168.148.75:8443/vasa/version.xmlNow you need to publish the cert for that you can run the below command:
/usr/lib/vmware-vmafd/bin/dir-cli trustedcert publish --cert <location> --login administrator --password <password>The actual example command will look similar to the below:
/usr/lib/vmware-vmafd/bin/dir-cli trustedcert publish --cert /storage/core/nimble192.168.148.60.crt --login administrator --password VMware123Now you can verify the actual entry using the below commands:
/usr/lib/vmware-vmafd/bin/vecs-cli entry list --store TRUSTED_ROOTSOnce done proceed with the upgrade. If still having issues feel free to comment on the article will be more than happy to help you.
Reference
You can also look at the below VMware article for more detail:
