With the end-of-life (EOL) announcement for CentOS Linux, many users are now seeking an alternative RedHat-based Linux distribution. Rocky Linux has emerged as a promising option due to its user-friendly interface and close resemblance to Red Hat’s experience. The best part is that Rocky Linux offers both commercial and community support.
In this article, we will explore the process of installing Rocky Linux on a server and learn how to convert it into a desktop environment if required.
Table of Contents
Prequiste to follow this article:
To successfully transform Rocky Linux into a desktop environment, you don’t need much, but a few essential prerequisites will make the process smoother. Here’s what you need:
- Laptop or Computer: You’ll need a laptop or desktop computer running Rocky Linux. Ensure that it is in working condition and properly set up with the latest updates.
- Internet Connectivity: An active and stable internet connection is necessary. This will enable you to download the desktop environment and any additional software packages required during the transformation.
- Patience: The process of transforming Rocky Linux into a desktop environment may take some time, especially if you’re installing a desktop environment for the first time. Patience is essential during the process.
- Bootable Media: In case you need to reinstall Rocky Linux or encounter any issues during the transformation, having a bootable USB drive or DVD with the Rocky Linux installation image can be helpful.
Downloading Rocky Linux
Rocky Linux is a free and community-driven operating system designed to offer a stable, secure, and reliable Linux distribution that is compatible with Red Hat Enterprise Linux (RHEL). If you’ve decided to make the switch from CentOS or other Linux distributions to Rocky Linux, the first step is to download the installation image.
- Selecting the Right Version: Before downloading Rocky Linux, it’s essential to choose the appropriate version based on your system architecture and requirements. Rocky Linux provides separate images for x86_64, ARM64, and other platforms. Ensure you select the correct version to avoid compatibility issues.
- Visit the Official Website: To get started, head to the official Rocky Linux website at www.rockylinux.org. The website offers a user-friendly interface and contains all the essential information about the project, downloads, and community support.
- Navigating to Downloads: Once on the website, navigate to the “Downloads” section. Here, you’ll find a list of available releases and architectures. Choose the version that aligns with your system specifications.
- Selecting a Mirror: Rocky Linux offers multiple mirror links from various locations worldwide. These mirrors facilitate faster and more reliable downloads. Choose a mirror link close to your geographical location to expedite the download process.
- Downloading the Image: Click on the download link corresponding to your chosen Rocky Linux version and architecture. The download will start automatically, and the image file will be saved to your designated location on your local machine.
- Verifying the Download: After the download is complete, it’s a good practice to verify the integrity of the downloaded file. Rocky Linux provides checksums on their website. You can use tools like
md5sum,sha256sum, or other cryptographic verification tools to ensure that the downloaded file matches the provided checksum.
With the Rocky Linux installation image downloaded and verified, you are now ready to proceed with creating a bootable medium and installing Rocky Linux on your system. The journey to experiencing the power of Rocky Linux and its seamless compatibility with RHEL awaits you.
Creating a Bootable Medium for Rocky Linux
Once you have downloaded the Rocky Linux installation image, the next step is to create a bootable medium that allows you to install Rocky Linux on your system. There are several methods to achieve this, but in this section, we will focus on using Rufus and also explore the option of Ventoy.
Using Rufus to Create a Bootable USB:
Rufus is a popular and user-friendly tool that allows you to create bootable USB drives from ISO files. Follow these steps to create a bootable USB drive for installing Rocky Linux:
- Download Rufus: If you don’t have Rufus installed on your system, you can download it from their official website (https://rufus.ie/). Rufus is available for Windows.
- Insert the USB Drive: Plug in your USB flash drive with sufficient capacity (at least 8GB) into an available USB port on your computer. Please note that all data on the USB drive will be erased during the process, so ensure you have backed up any important data.
- Launch Rufus: Run the Rufus application on your computer. It typically doesn’t require installation; just run the downloaded executable.
- Select the USB Drive: In Rufus, it should automatically detect your USB drive. If not, choose it from the “Device” dropdown menu.
- Select the Rocky Linux Image: Click on the “Select” button next to “Boot selection” and choose the Rocky Linux ISO file that you downloaded earlier.
- Choose Partition Scheme and File System: In most cases, the default settings for the partition scheme (usually MBR) and file system (usually FAT32) should work fine. If you need to customize these options for any specific reason, you can do so.
- Start the Process: Click on the “Start” button in Rufus to begin creating the bootable USB drive. A warning prompt will appear, informing you that all data on the USB drive will be destroyed. Confirm and proceed.
- Wait for Completion: Rufus will now begin writing the Rocky Linux image to the USB drive. The process may take several minutes, depending on the speed of your USB drive and system.
- Boot from the USB Drive: Once the process is complete, safely eject the USB drive from your computer. You can now use this bootable USB drive to install Rocky Linux on your system. To do this, insert the USB drive into the target system, restart the computer, and boot from the USB drive. Follow the on-screen instructions to start the installation process.
Exploring Ventoy:
Ventoy is another powerful tool for creating a multiboot USB drive. Unlike Rufus, Ventoy allows you to copy multiple ISO files onto the USB drive and boot from any of them directly without the need to recreate the bootable USB drive every time you want to try a different operating system. Here’s how you can use Ventoy to create a bootable USB drive with Rocky Linux:
- Download Ventoy: Visit the Ventoy website (https://www.ventoy.net) and download the appropriate version for your operating system.
- Install Ventoy on the USB Drive: After downloading Ventoy, follow the instructions provided on their website to install it on your USB drive. This process essentially makes the USB drive a multiboot device.
- Add Rocky Linux ISO to the USB Drive: Once Ventoy is installed on the USB drive, you can copy the Rocky Linux ISO file directly onto the drive. Ventoy will automatically detect the ISO file and make it available as a boot option.
- Boot from the USB Drive: With the Rocky Linux ISO file on the Ventoy USB drive, you can now insert it into your target system and boot from it. The Ventoy menu will appear, showing all the available ISO files on the drive. Simply select the Rocky Linux entry to start the installation process.
Using Rufus or Ventoy, you can create a bootable medium for Rocky Linux quickly and easily. Choose the method that suits your preferences and needs.
Rocky Linux Installation
With the bootable medium ready, you are now all set to begin the installation of Rocky Linux on your system. The installation process is straightforward and user-friendly, making it accessible even for those new to Linux. In this section, we will walk you through the steps of installing Rocky Linux on your computer.
Step 1: Booting from the Installation Media
- Insert the bootable USB drive or DVD with the Rocky Linux installation image into your computer.
- Restart your computer, and as it boots up, access the BIOS/UEFI settings (usually by pressing a specific key like F2, F12, ESC, or Delete during the boot process). Set the boot order to prioritize the bootable media you inserted.
- Save the changes and exit the BIOS/UEFI settings. The system will now boot from the Rocky Linux installation media.
Step 2: Starting the Installation
- Once the system boots from the installation media, you will be presented with the Rocky Linux installation screen. Select “Install Rocky Linux” and press Enter.
- The installation process will begin, and you will be guided through a series of steps to configure your system.
Step 3: Language and Keyboard Settings
- Select your preferred language for the installation process and the final system.
- Choose the appropriate keyboard layout for your system.
Step 4: Disk Partitioning
- You will be prompted to choose your disk partitioning method. If you’re new to partitioning, selecting “Automatic” is the easiest option, as it will handle the partitioning for you. However, if you have specific requirements or want to customize your partitions, you can choose the “Manual” option.
- Review and confirm the changes to the disk partitions before proceeding.
Step 5: Network Configuration
- Configure your network settings, such as setting a hostname for your system and configuring the network interface.
- If your system is connected to the internet, you will have the option to enable network time synchronization.
Step 6: Set Root Password
- Set the root password for your system. The root user is the superuser with administrative privileges.
Step 7: User Account Creation
- Create a regular user account with a username and password. This account will be used for everyday tasks, and you will be able to use it to log in to the system.
Step 8: Package Selection
- Select the software packages you want to install. You can choose a predefined environment (e.g., Minimal, Server, Workstation) or customize the package selection according to your needs.
Step 9: Begin Installation
- Review all the settings and configurations you have chosen thus far. Once you are satisfied, initiate the installation process.
- The installation will now commence, and the required packages will be installed on your system.
Step 10: Complete the Installation
- Once the installation is complete, you will be prompted to reboot your system. Remove the installation media (USB drive or DVD) and press Enter to restart your computer.
- Congratulations! Your system is now running Rocky Linux. You can log in using the user account you created during the installation process.
Transforming Rocky Linux into a Desktop Environment
Rocky Linux, being a server-focused distribution, comes with a minimalistic installation designed to provide a stable and reliable platform for server deployments. However, if you prefer to use Rocky Linux as a desktop operating system, you can easily transform it into a full-fledged desktop environment with a graphical user interface (GUI) and various desktop applications. Here’s how you can achieve this:
- Update the System: Before proceeding with the desktop transformation, ensure your Rocky Linux system is up-to-date. Open a terminal and run the following commands:
sudo yum update && sudo yum upgrade- Install a Desktop Environment: Rocky Linux offers multiple desktop environments, each with its unique look and feel. Some popular choices include GNOME, KDE Plasma, Xfce, and Cinnamon. You can install your preferred desktop environment using the package manager. Please make sure you Attached the lan cabel to the lapotop/desktop for the proper internet. This process will take time as it depend upon your internet speed. For example, to install GNOME, run:
sudo yum groupinstall "Server with GUI"- Set Display Manager (Optional): You can set up a display manager to manage the login screen and provide a user-friendly login experience. Popular display managers include GDM (for GNOME), SDDM (for KDE Plasma), and LightDM (works with various desktop environments). Install your preferred display manager and set it as the default using:
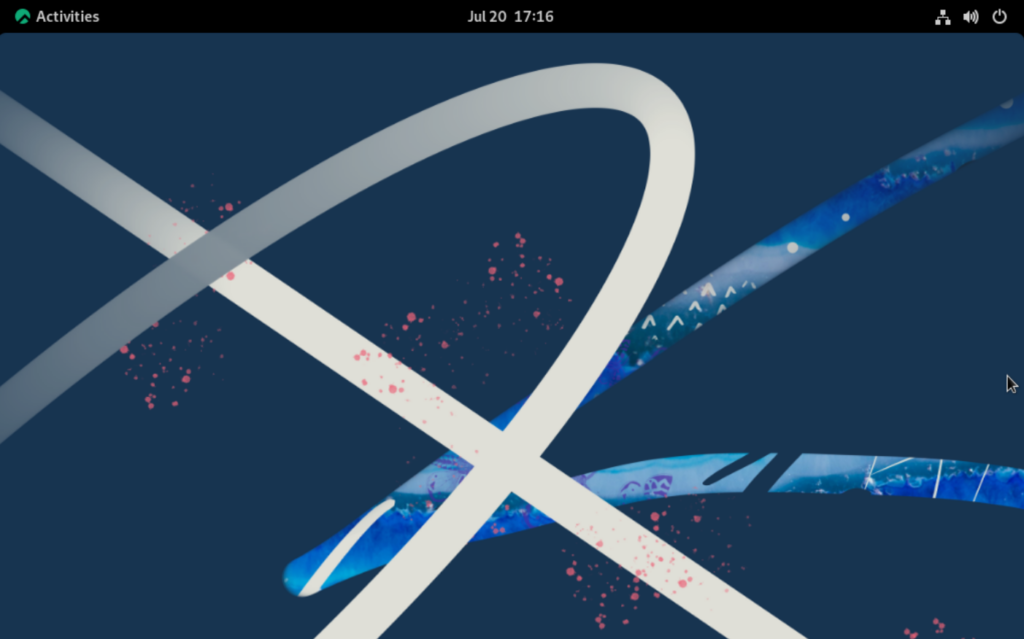
sudo systemctl set-default graphical- Once the above steps done, You need to reboot you machine using the below command and you will login into the rocky gnome desktop
sudo reboot
Conclusion
In conclusion, transforming Rocky Linux into a GNOME desktop environment provides users with a seamless transition from a server-focused distribution to a fully functional and user-friendly operating system. With the installation of GNOME, users gain access to a wide range of desktop applications, a visually appealing interface, and a familiar computing experience.
Throughout this article, we have explored the step-by-step process of installing the GNOME desktop environment on Rocky Linux. By following these instructions and prerequisites, users can easily customize their Rocky Linux systems to suit their desktop computing needs.
If you encounter any issues during the installation process or have any questions, feel free to reach out to me on Twitter. Your feedback and queries are valuable, and I’m here to help you make the most of your Rocky Linux desktop experience.
Enjoy using Rocky Linux with GNOME and explore the vast possibilities that this powerful Linux distribution has to offer for both server and desktop environments. Happy computing!


