So today will talk about TrueNAS and how we can use it. For the past sometimes I am planning to create a video on TrueNAS. Finally, it is here. I am testing this for a long time. So let’s start with the TrueNAS article.
Table of Contents
What is TrueNAS?
TrueNAS is open source NAS OS.That you can install on any machine and use that as a NAS. There are lots of offerings from TrueNAS. Even you can buy a pre-configured TrueNAS system. TrueNAS is developed by iXsystems. But today’s article will talk about the TrueNAS Core and TrueNAS Scale. TrueNAS Core is built upon open BSD. On the other hand, TrueNAS Scale is based on Debian Linux.
Today’s article will use the TrueNAS Scale as it is Debian-based.
Required Software link
- TrueNAS Scale – The NAS OS download from the below button.
- VirtualBox – The virtualize software download from the below button.
How to Setup TrueNAS Scale in VirtualBox
Once you have the virtual box setup you need to follow the below steps to set up a TrueNAS virtual machine.
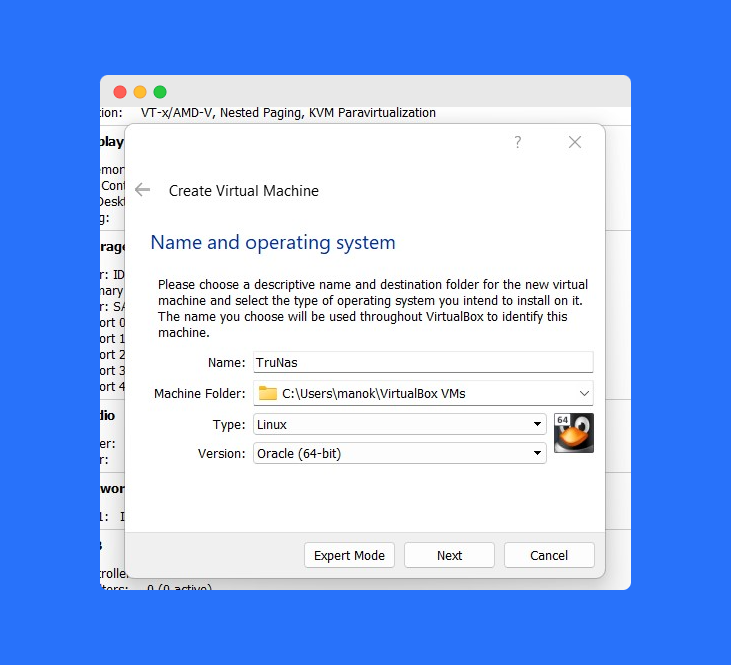
- Click on NEW and give the name of the machine and select the type.
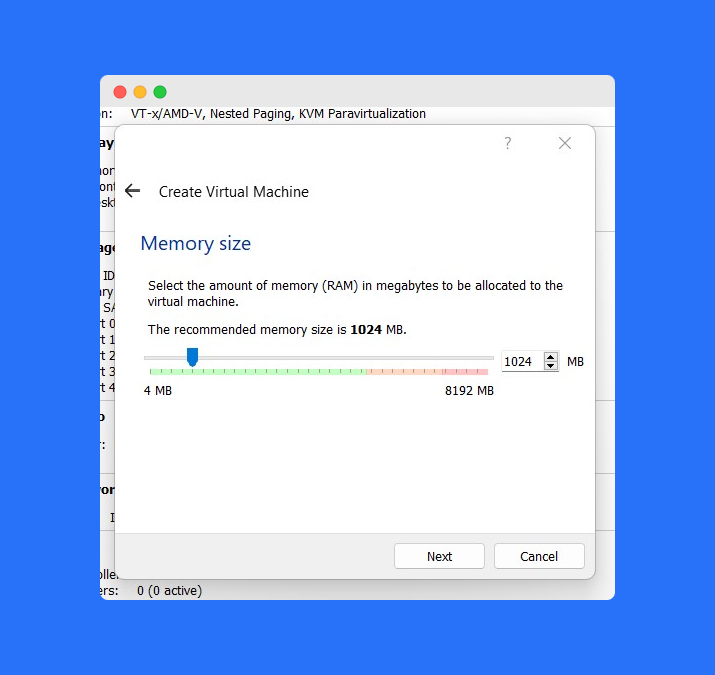
- Now it will ask for the RAM size from your machine giving a small proportion to it. Here I am using 1 GB.
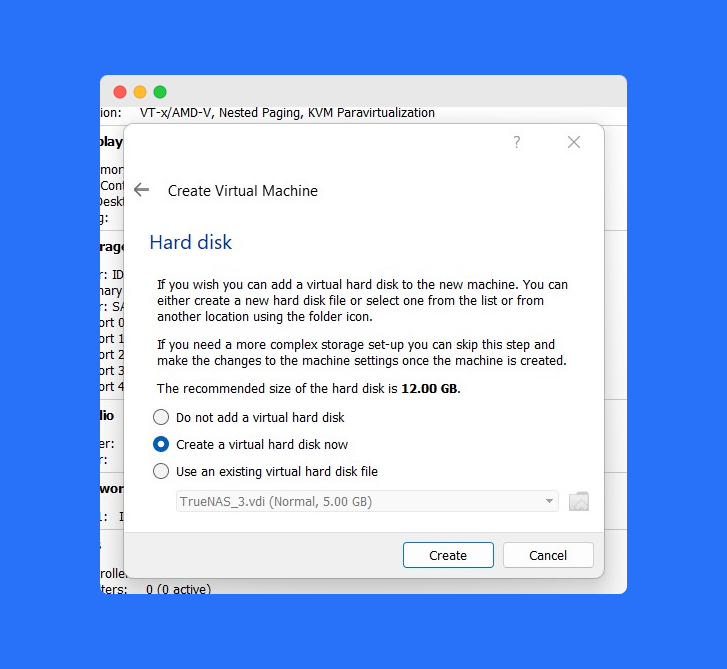
- Now it will ask you to create a boot drive to store your os data.
- Once done your machine is ready
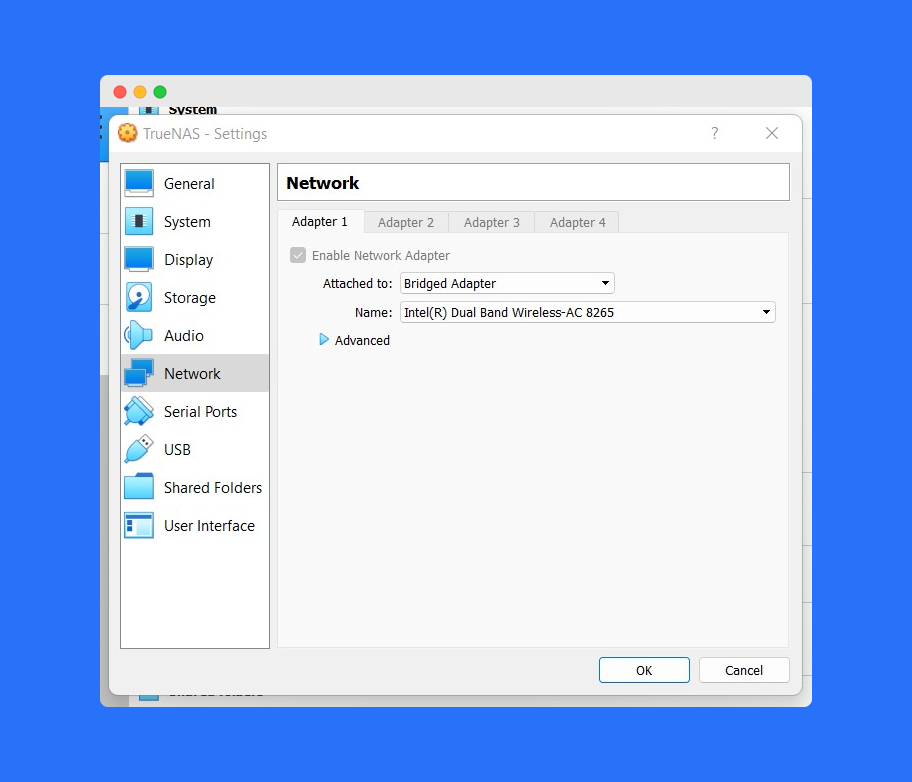
- Now click on setting and go on a network and select the bridge adapter.
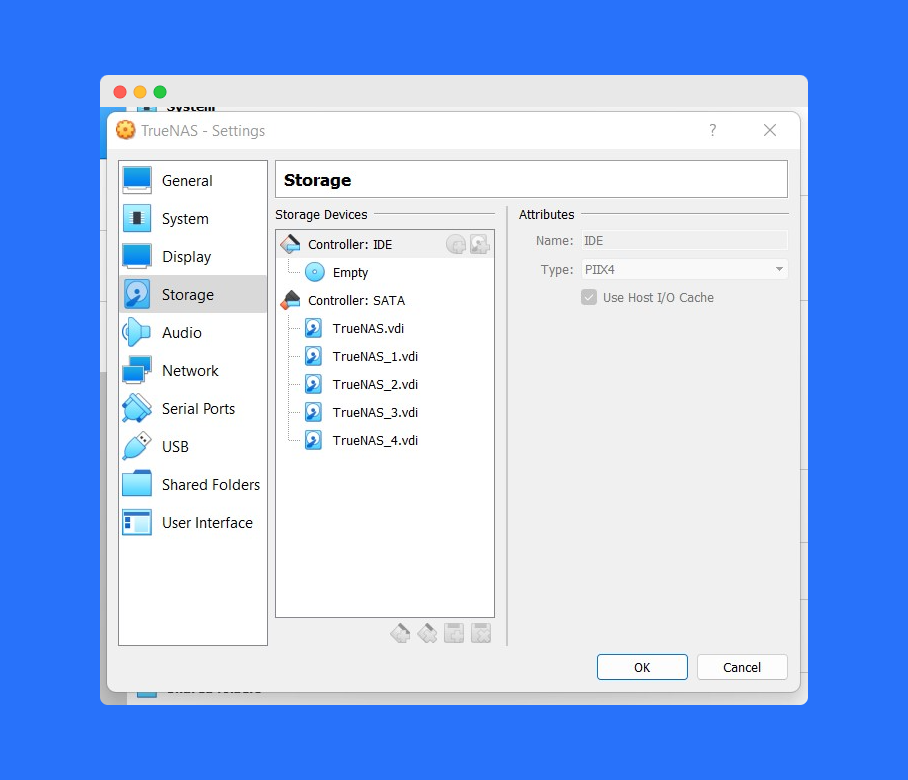
- Now you need to add the drive in TrueNAS VM. Click on storage add there is a small drive icon in the controller: IDE click there and create a few drives for storing data.
- Once the drive is added add the iso image from the controller: IDE and click on the disk icon and select the TrueNAS iso.
- Now you are good to start your TrueNAS VM.
TrueNAS Installation
From the previous steps, you created your TrueNAS VM in VirtualBox. Now let’s start installing the TrueNAS os.
- Click on the Start button in VM.
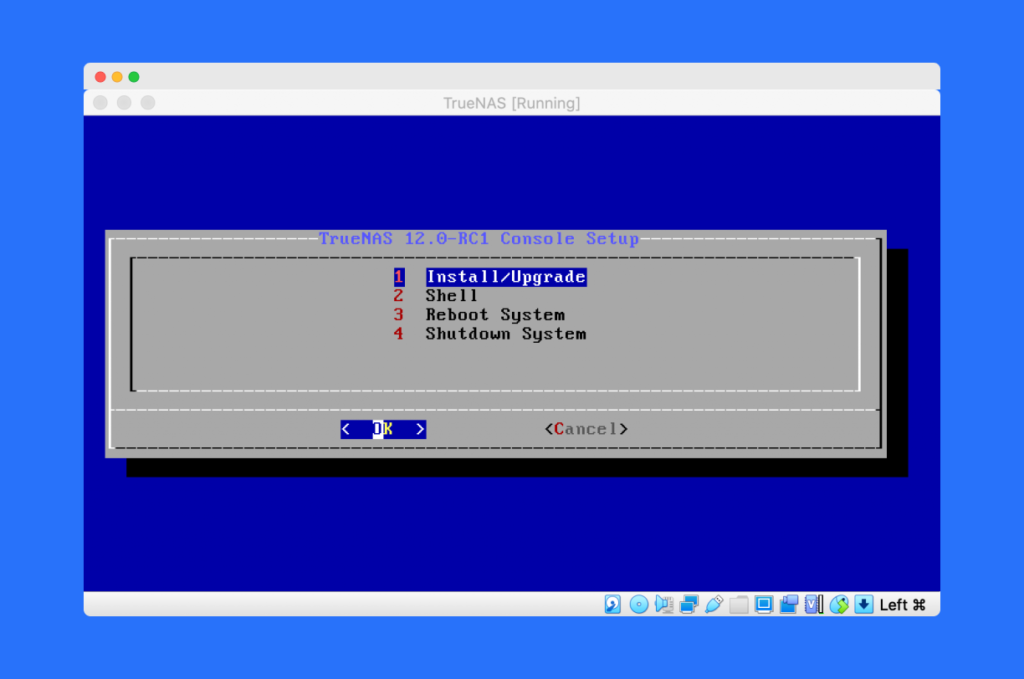
- Wait for the autoboot to kick in, After that it shows a below window and select the install/Upgrade.
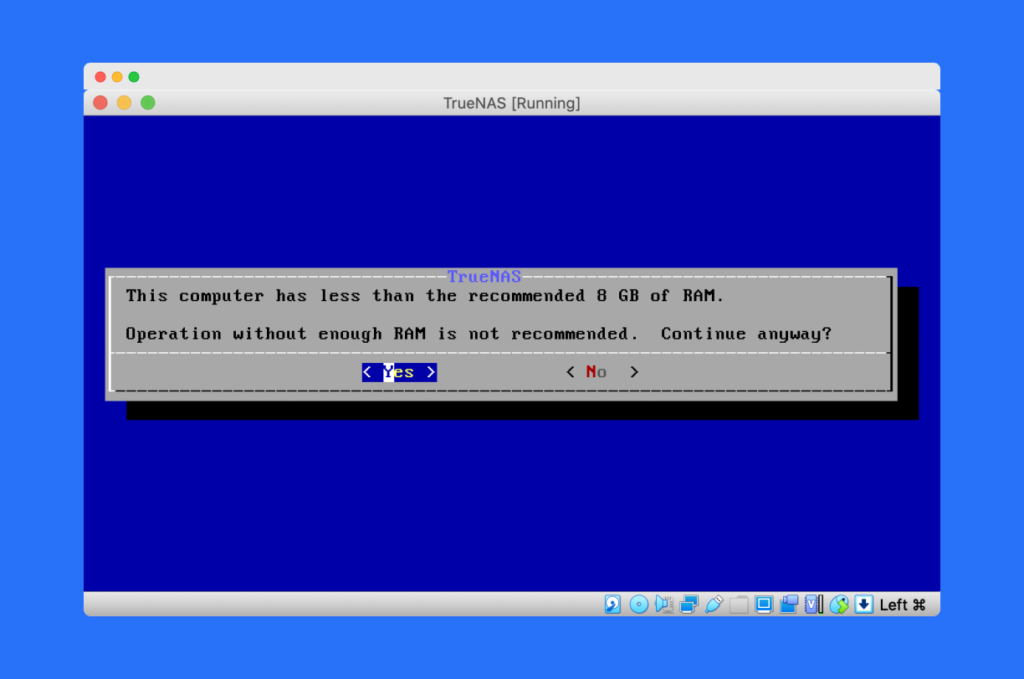
- As we give only one 1 GB ram it will give you a warning as recommended RAM is 8GB hit yes and continue anyway.
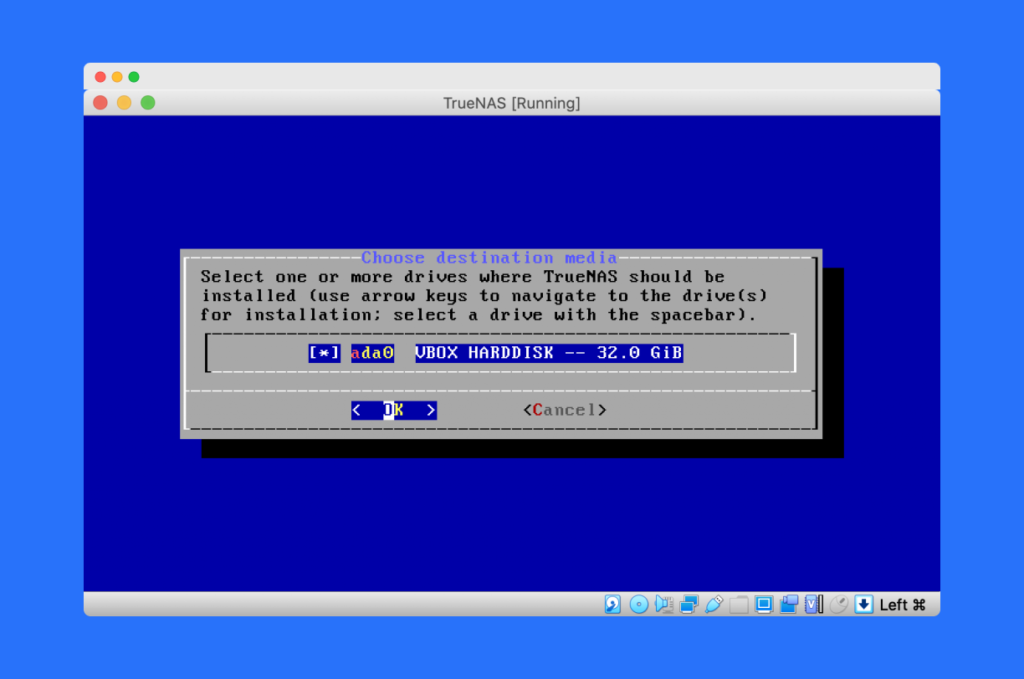
- Now it will ask to select the drive for the boot. select the sda0 from the space and hit enter
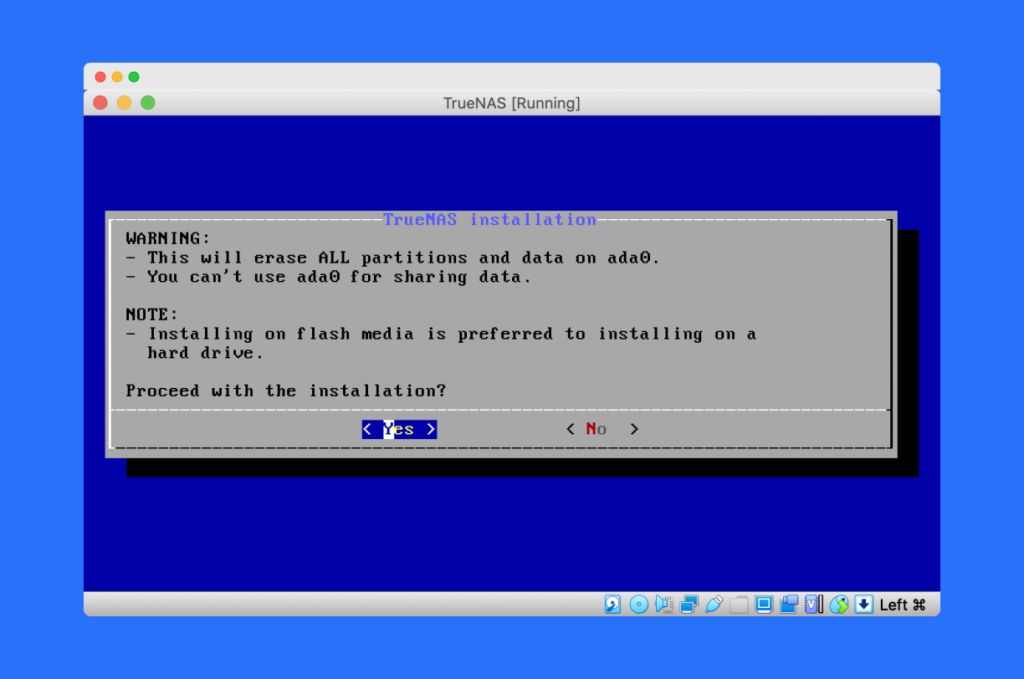
- Now it will show a warning that whole data will be erased in the drive click on yes and proceed with the installation.
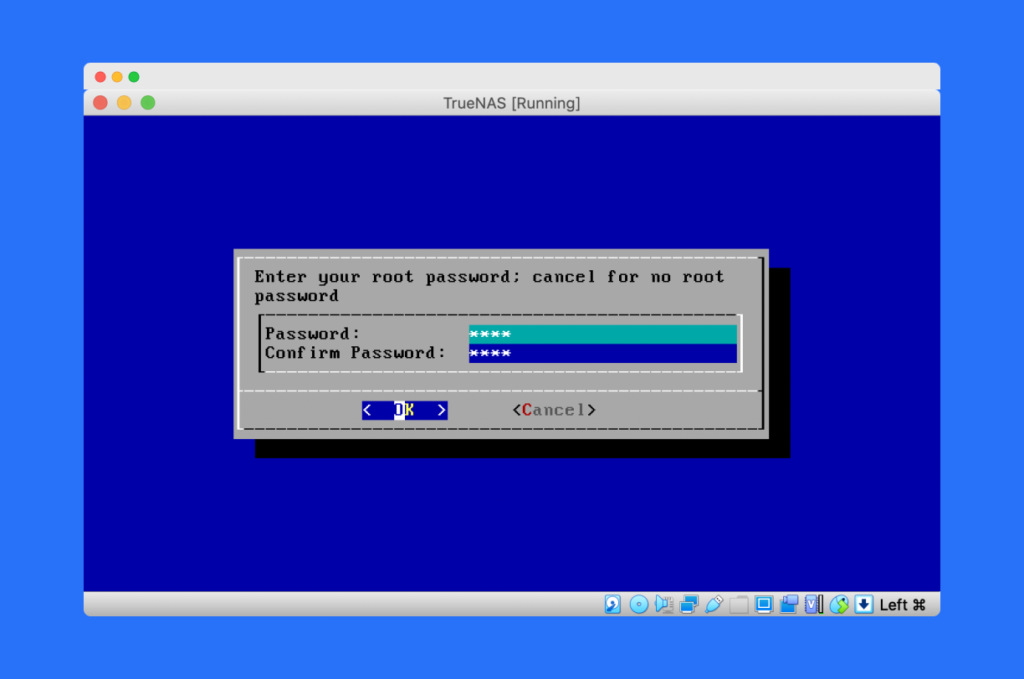
- Not it will ask you to select the password. Set a password using which you can enter to your TrueNAS web console.
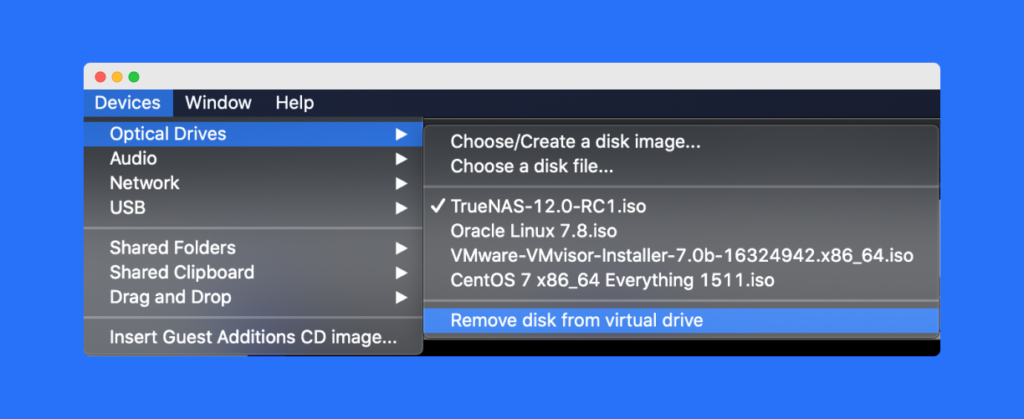
- After some time the TrueNAS will be installed. and it will show your the below screen. Now you need to remove the iso from the Vm and again start the VM. For removing the TrueNAS iso click on devices and optical drive and select to remove the disk from virtual Disk. After that reboot the machine.
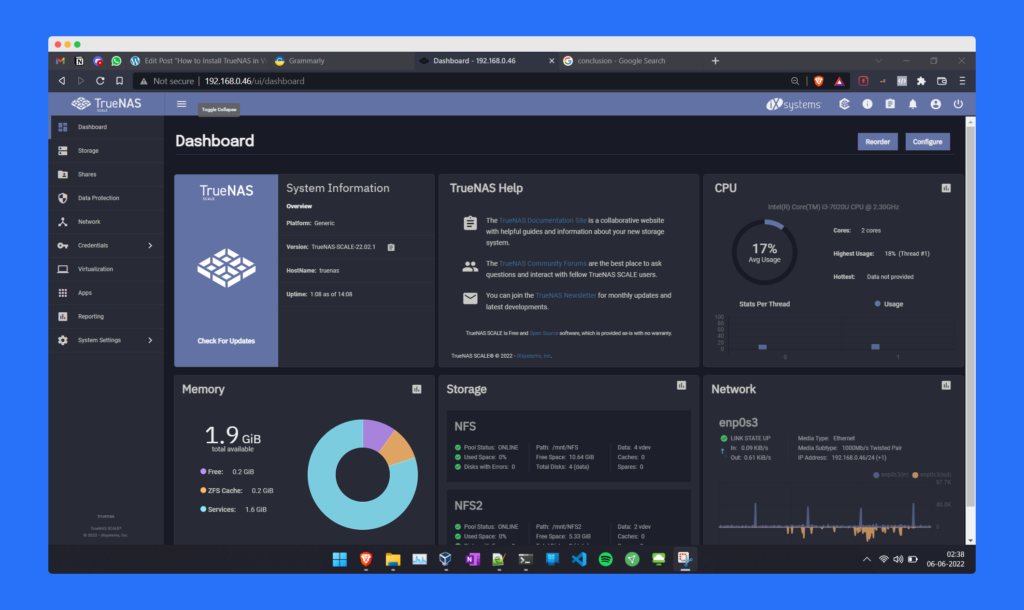
- Once the machine is booted it will show like below. There you can find the web console IP.
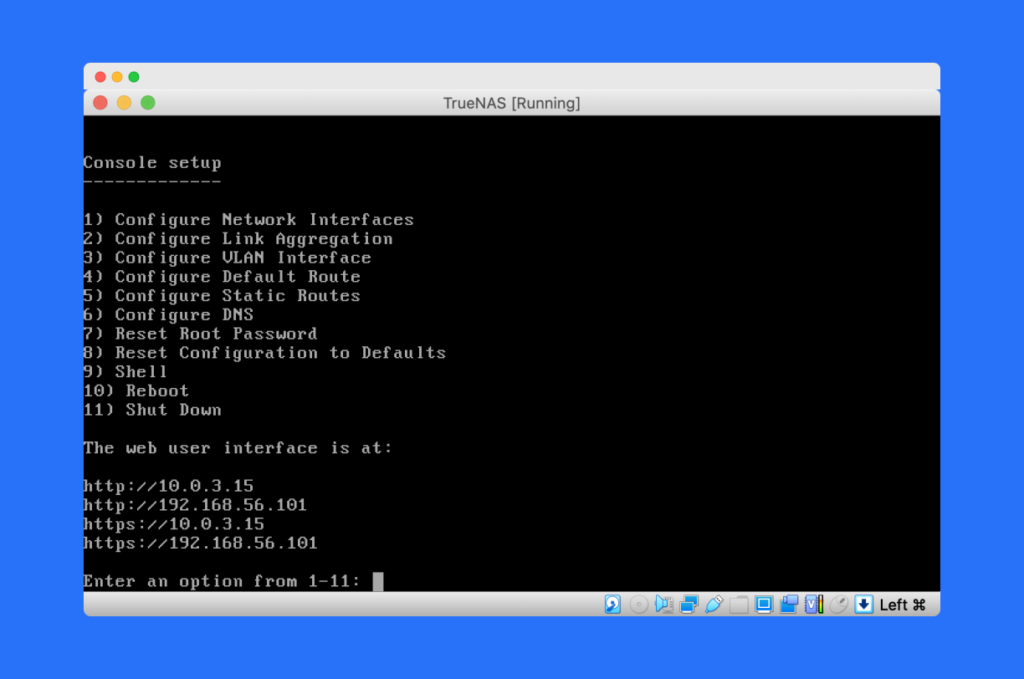
- Copy that web console IP and open it in a web browser it will ask for the password. Enter the password that you set while installing the TrueNAS. Select user as Root.
How to assign a static IP to TrueNAS
Now you have your TrueNAS setup but you will operate your TrueNAS as a headless(mean without monitor and keyboard). You will access the TrueNAS machine over the Ip. So it is so important to have a static Ip. So that you can bookmark that and have easy access. But if you go with the DHCP so it will change in the future and it will create an issue.
So now let’s see how we can set up a Static IP to the TrueNAS machine.
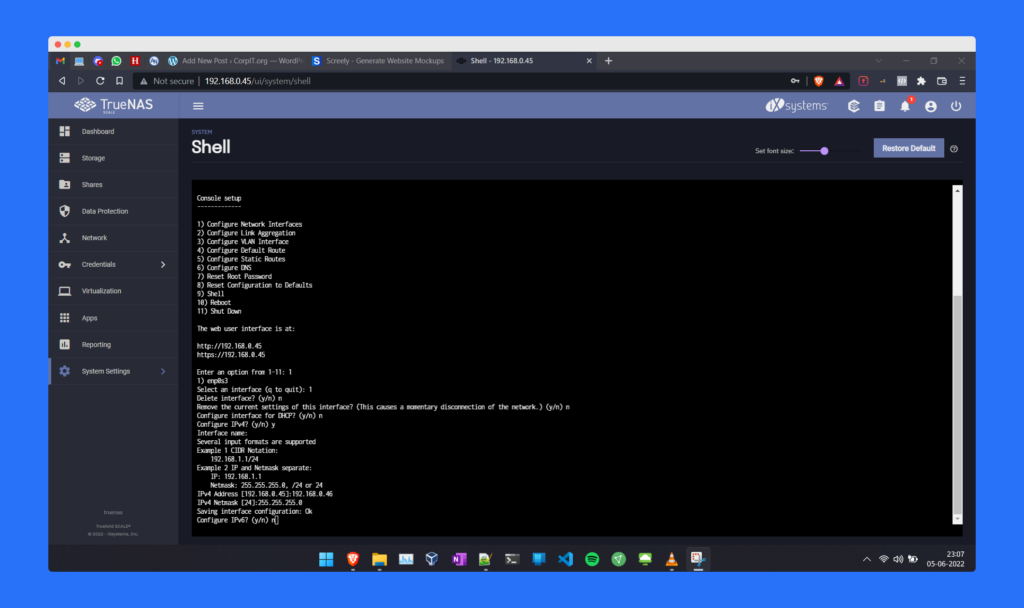
- Open the web console and go to the setting and select the shell.
- Once the shell is open enter /etc/netcli
- From the menu select the first option “Configure Network Interfaces”
- It will ask you to select the interface select the default interface
- Now it will ask if you want to delete the interface and hit “n”
- It will ask if you want to remove the current setting from the interface hit “n”
- It will ask if you want to set up using DHCP select “n”
- Now it will ask if you want to configure the IPv4 select yes by hitting “y”
- It will ask for the interface name let it be default hit enter
- Now you need to add an IPv4 address and select an address from your network that is not in use
- Now it will ask for the netmask select 255.255.255.0
- It will ask if you want to set up the IPv6 hit “n” and it will restart the machine and try to connect the machine to the new IP
So using the above steps you can give a static IP to your TrueNAS machine.
How to create a pool in TrueNAS
To create a pool in the TrueNAS you need to login into the web console and follow the below steps:
- Select storage from the Right pannel
- Click on “Create Pool”
- Select the drive that you want to use to create the Pool.
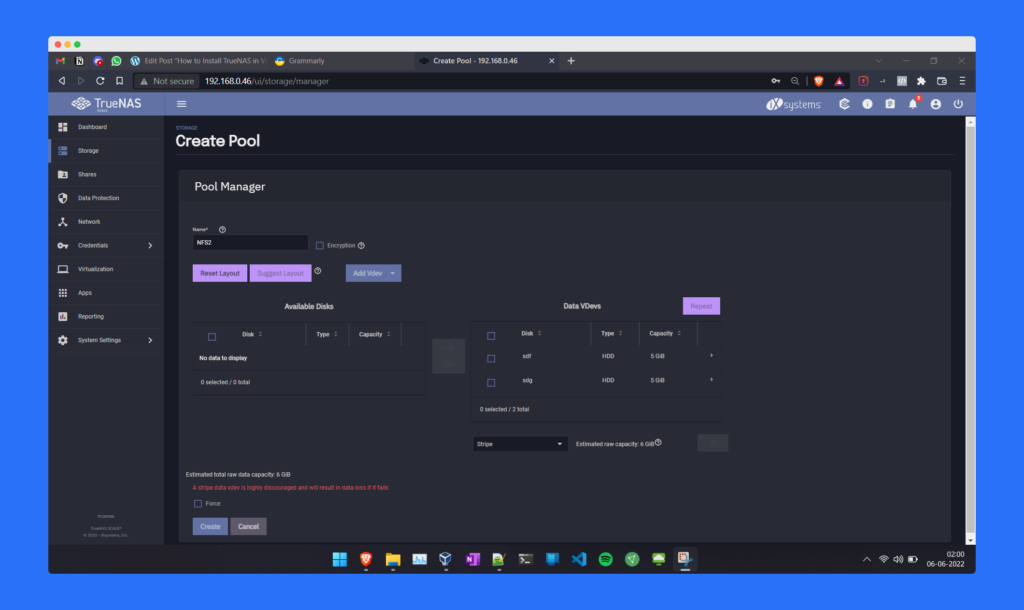
- Once drives selected the raid level like stripe, mirror, raidz, and so on.
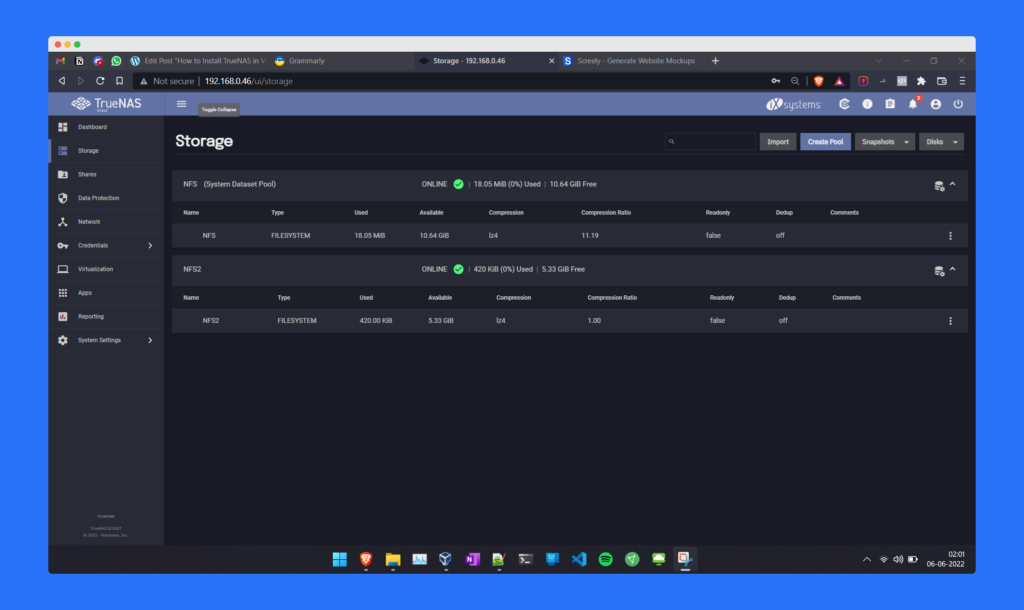
- Click creates and a pool will create in the system.
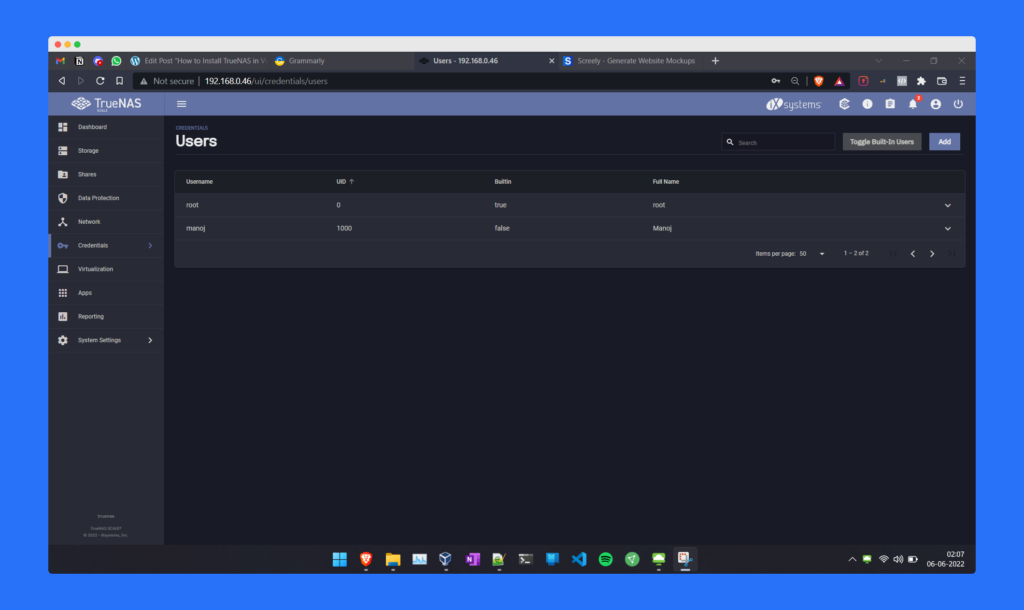
How to create user in TrueNAS
Now we created the Pool in the TrueNAS. Now let’s create the USER in TrueNAS. Let’s see how we can create that.
- Select credentials to option from the right panel and click on local user
- Click on add and fill in the details like Name, Username, Email, Password, Home Directory, Home Directory Permissions and click on Permit Sudo. Set the remaining option default.
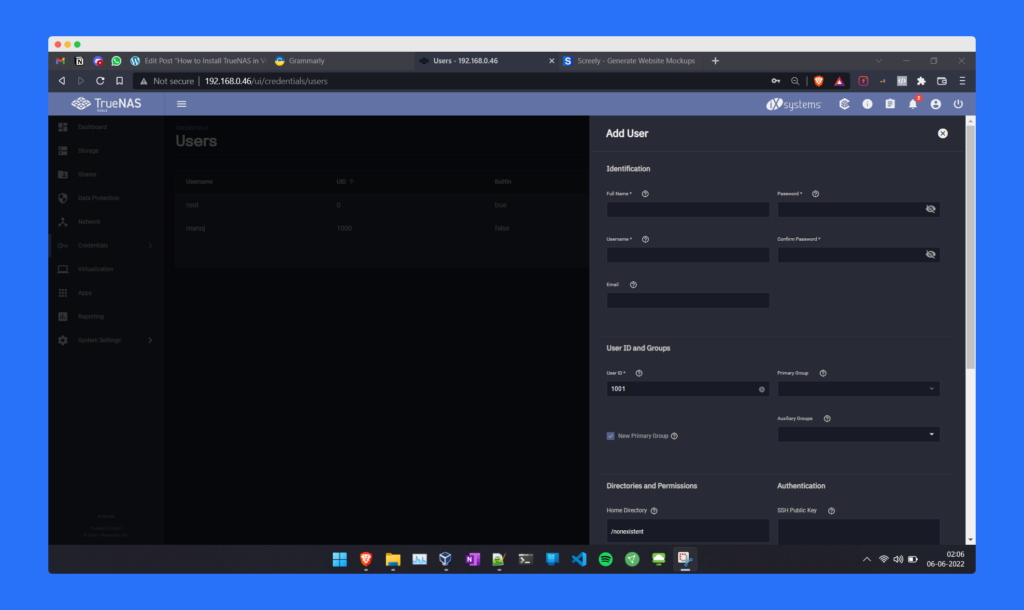
- Now we have a custom user in the TrueNAS system.
Now comes the fun part how we can use these pools in day-to-day life. For that, we need to create an NFS share for Linux and CIFS share for the window. So now in the next section will see how we can create the CIFS share or Windows (SMB) Shares in the TrueNAS.
How to access TrueNAS Share in Windows
To create the CIFS or SMB share in the TrueNAS we need to follow the below steps:
- We need to select the share option from the right side of the web console.
- Where we found an option of “Windows (SMB) Shares” beside that we found a button add. Click on that.
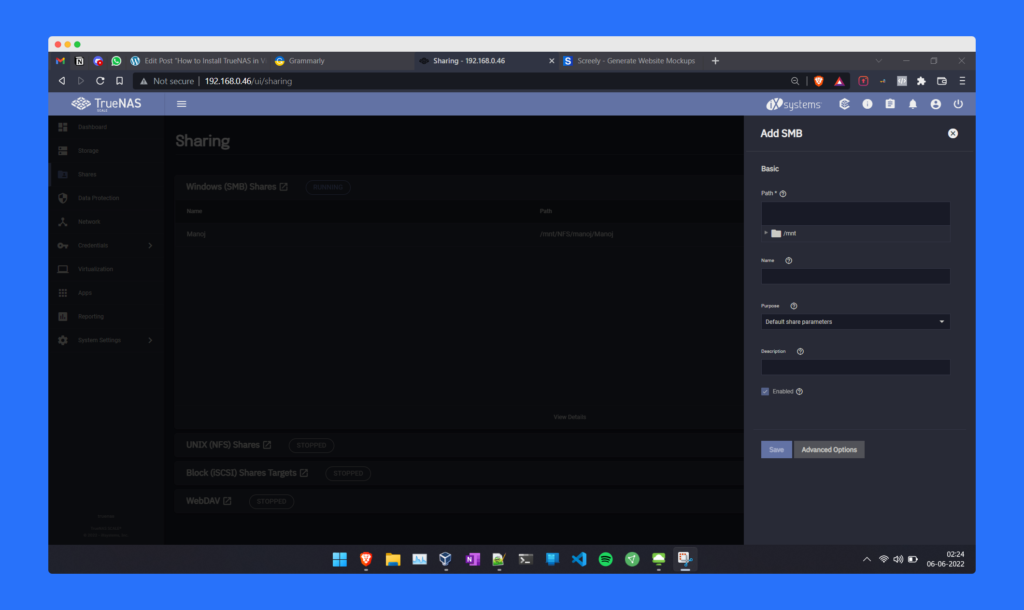
- Give the Path and Name and hit create.
- Now we need to enable the service beside the add Button you will find the 3 dots hit there and click on “Turn On Service”. It will enable the SMB service.
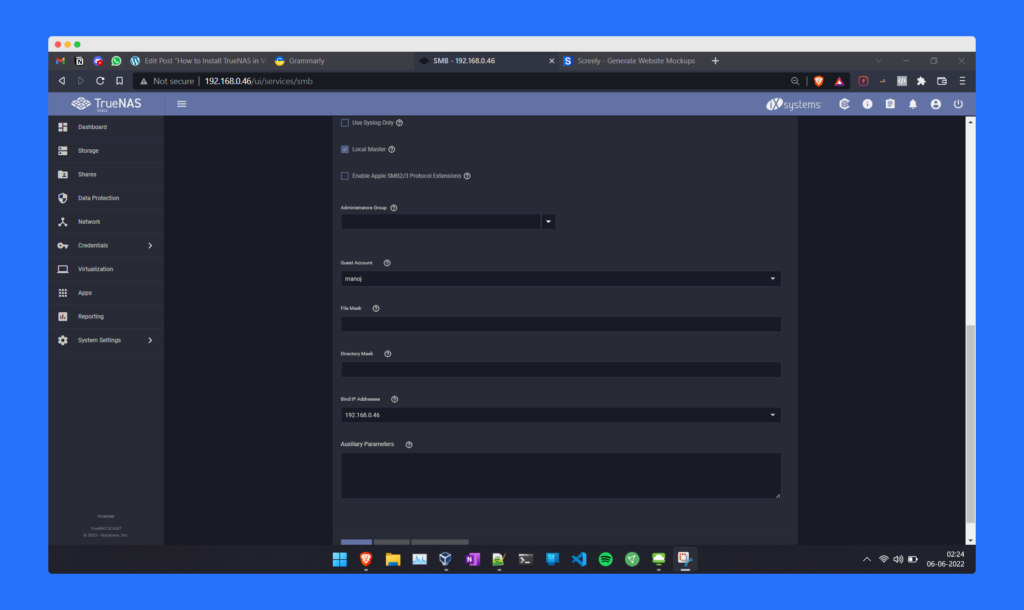
- Now click on 3 dots and click on Config service
- Now click on the advance option and find the option guest Account and select the account that you created and hit save.
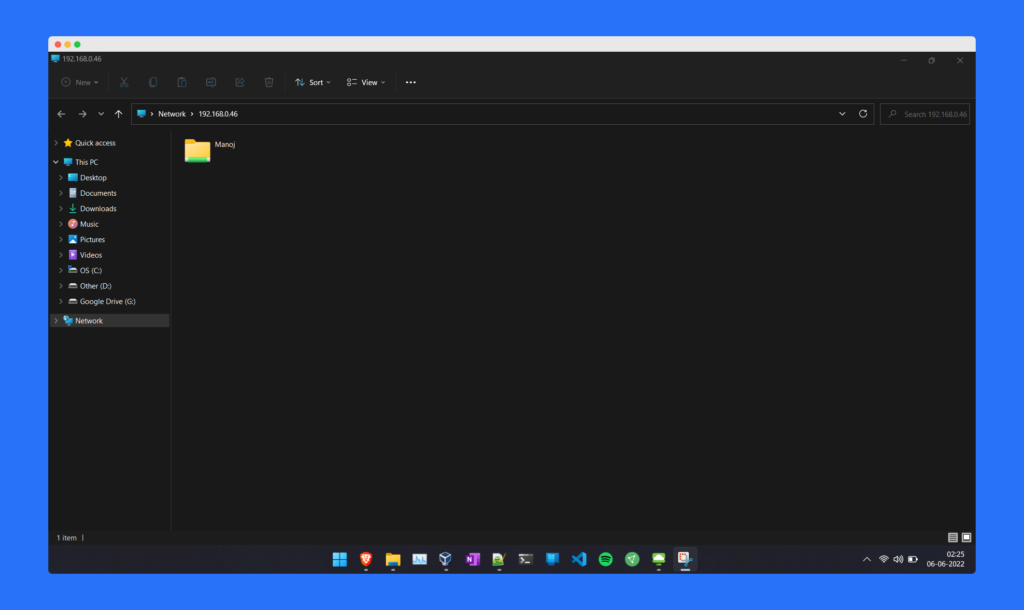
- Now open run and enter your TrueNAS Ip with \\ and your share is ready to use. Like in my case \\192.168.0.46
How to access TrueNAS Share in Linux
Now the last piece of the puzzle. Setting up the NFS share in the TrueNAS and accessing that in the Linux Machine.
- We need to select the share option from the right side of the web console.
- Where we found an option of “UNIX (NFS) Shares” beside that we found a button add. Click on that.
- Add the path and hit save.
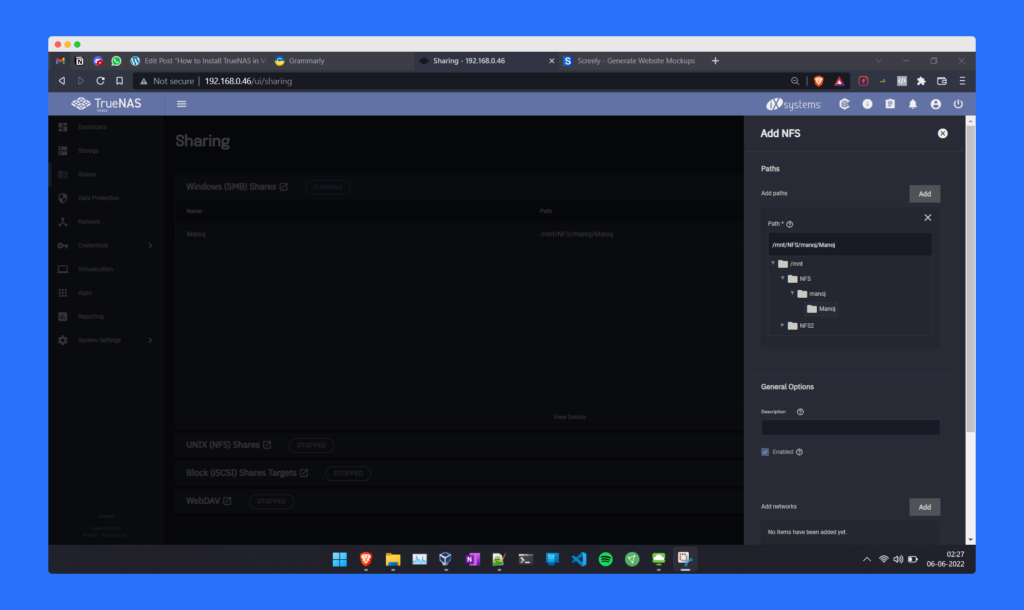
- Now we need to enable the service beside the add Button you will find the 3 dots hit there and click on “Turn On Service”. It will enable the NFS service.
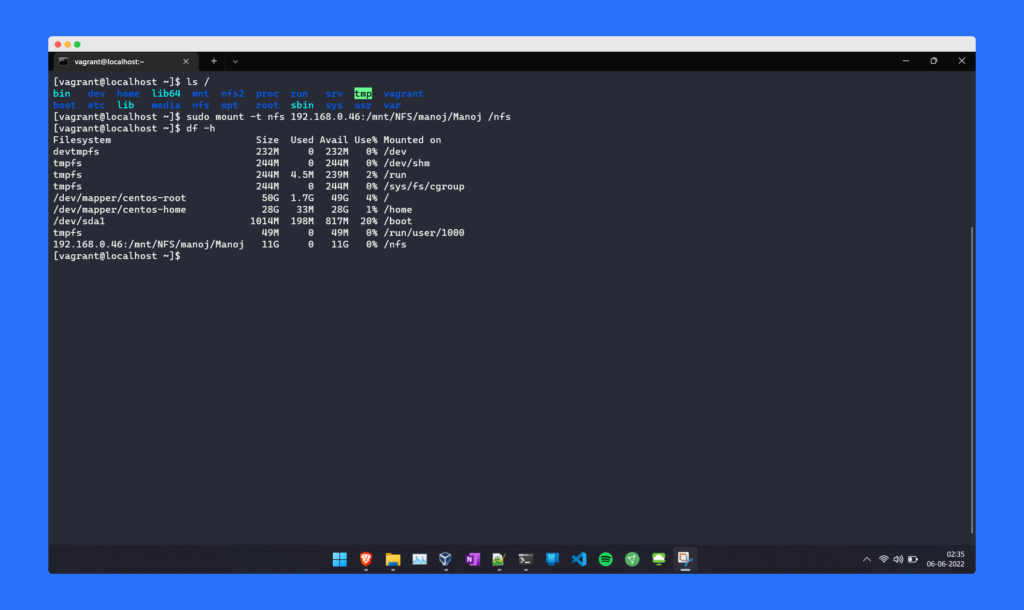
- Now open your Linux machine here I am using the centos.
- Make a dir using the command mkdir /NFS
- Using the below command mount that NFS on the Linux machine.
sudo mount -t nfs 192.168.0.45:/mnt/NFS/manoj/Manoj /nfs - Here you go. Now you have your share mounted on the Linux system.
Conclusion
In conclusion, this article has provided you with the necessary information to set up and use TrueNAS. Future articles will delve into additional topics related to TrueNAS. This guide is suitable for those who are completely new to the program. If you have any questions, please leave a comment, and we will be happy to assist you further. Keep an eye out for more informative articles like this one.
FAQ
What are the system requirements for installing TrueNAS in VirtualBox?
VirtualBox version 6.1 or later is required.
How do I create a virtual machine for TrueNAS in VirtualBox?
Select “FreeBSD” as the type and “FreeBSD (64-bit)” as the version.
Assign at least 8GB of RAM and 64GB of storage to the virtual machine.
Start the virtual machine and use the TrueNAS ISO image to install the operating system.
How do I configure network settings for TrueNAS in VirtualBox?
Select “Network” and choose “Bridged Adapter” as the Attached to option.
This will allow the virtual machine to have its own IP address on your network, allowing you to access the web interface.
Can I use a USB drive to install TrueNAS in VirtualBox?
You will need to configure the virtual machine’s storage settings to use the USB drive as the virtual drive.


Thanks, Very helpful.
Thanks Ferry
Thx, worked well with Truenas Core 2023 too 🙂
Thanks GN
Good!!
Thanx man
Pum!! Zasss Tras
Thanx Man
I have had truenas core running on HyperV win10 for 2 years now – no issues. assigned 12GB ram as I have a 8TB Riadz2 (4 x 4tb disks).
Just find hyperv more user friendly and more efficient on windows.
Thought about doing the reverse. Truenas OS and windows VM but heard bad reveiws about truenas running windows VM’s.
Don’t use that use proxmox and install window VM and Truenas VM, Passthrough your harddrive to the Truenas VM.
That will also work if you want.
this is very nice!!!